1-项目导学页
1.1 - 项目介绍
todoApp 能够合理让员工规划工作日程,让管理者及时掌握员工工作饱和度、工作进展状况等等。这样不管是个人高效完成工作,还是团队协同作业,都可以轻松搞定。日事清的核心功能是日程管理、任务协作和工作笔记,三者有机结合互为一体,让工作体验变得轻松。
1.2 - 教学目标
本项目为 Vue全家桶实现日事清,主要为使用 Vue 及其生态构建 TodoApp。主要考察对 Vue 及其相关生态在项目中的应用能力,分成以下两个部分:
Vue-CLI3
Vue-router
Vuex
1.3 - 前置技能
掌握 HTML
掌握 CSS
掌握 Less
掌握 JavaScript
了解 Vue
了解 Vue-router
了解 Vuex
效果图
2-项目剖析页
2.1 - 项目解读
本项目为 Vue全家桶实现日事清,主要为使用 Vue 及其生态构建 TodoApp。项目主要包含以下几个模块:
输入框
列表
状态导航
2.3 - 技能要求
掌握 HTML
掌握 CSS
掌握 Less
掌握 JavaScript
了解 Vue
了解 Vue-router
了解 Vuex
2.4 - 项目拆解
本项目主要分为 12 个任务:
任务一: 环境搭建 主要通过 Vue-CLI 3 快速搭建 Vue 开发环境,清空默认的结构与样式。并参照 todomvc.com 在 App.vue 中完成基础结构与样式引用。
任务二:列表渲染 主要通过在 Vue data 属性中定义 todos 列表的默认数据 todos 数组,然后使用 for 循环语法,把数据渲染到页面上。
任务三:列表修改 通过 v-model 双向绑定 todo 数据与 input 元素的关系,通过改变 input 内容实现动态修改。少侠不妨再思考一下 Vue监听文本框数据变化有几种方式? 不知道也没关系,内事问百度外事问谷歌。
任务四:状态切换 todolist 中有 完成和未完成两个状态,想看哪里点哪里。
任务五:添加项目 监听回车事件,获取当前输入值往 todos[Array] 数据中 push 新数据实现数据的添加。
任务六:删除项目 通过监听删除事件,获取当前删除元素匹配在 todos 的位置使用数组 splice 方法删除数据。
任务七:项目筛选 通过定义筛选条件,根据条件的不同 filter 返回不同的展示数据。
任务八:组件分离 通过组件的分离,使结构更有层级性及复用性。
任务九:添加路由 主要通过 Vue-router 实现路由的切换,不同的路由地址匹配不同的筛选条件展示不同的数据。
任务十:全局数据 主要通过 Vuex 实现全局数据管理,在跨组件的数据通讯中显得更加的便利。
3-任务详情页
3.1 -环境搭建
Vue CLI 是一个基于 Vue.js 进行快速开发的完整系统,致力于将 Vue 生态中的工具基础标准化。它确保了各种构建工具能够基于智能的默认配置即可平稳衔接,这样你可以专注在撰写应用上,而不必花好几天去纠结配置的问题。
在本任务中,我们使用 Vue CLI3 构建 Vue 开发文件,同时参照 todomvc.com 中的实现效果,在完成 App.vue 中完成 HTML 及 CSS 的基础建设。
任务要求:
1、使用 Vue CLI 来搭建 Vue 开发环境。
2、完成 Todos 的结构与样式
任务提示:
下载安装 Vue-CLI 3,使用 vue create
Vue-CLI 3参考地址 https://segmentfault.com/a/1190000014627083
3.2- 列表渲染
在上一任务中,我们已经完成了基础结构的建设,在本次任务中,我们需要把默认数据渲染到页面中。在 Vue.data 中定义 todos 存储列表数据,每一项中包含 title、compeleted 字段来表示名称与状态。在 templete 模版中通过 for 语句渲染 todos 数据,再在 class 中匹配项目中的 completed 属性,如果项目中 completed 为 true 展示已完成状态。
任务要求:
1、在 Vue.data 中定义 todos,并在页面中绑定与展示。
2、todos 项目中,需要有完成和未完成状态。
任务提示:
1、在 Vue.data 中定义 todos,todo 包含 title、completed
2、在 templete 中使用 for 绑定 todos 数据进行渲染
1 | <ul class="todo-list"> |
给li 绑定一个v-for对象;绑定V-bind(:为简写)class属性,用于切换CSS样式
1 | export default { |
效果图
css样式还没做好。。。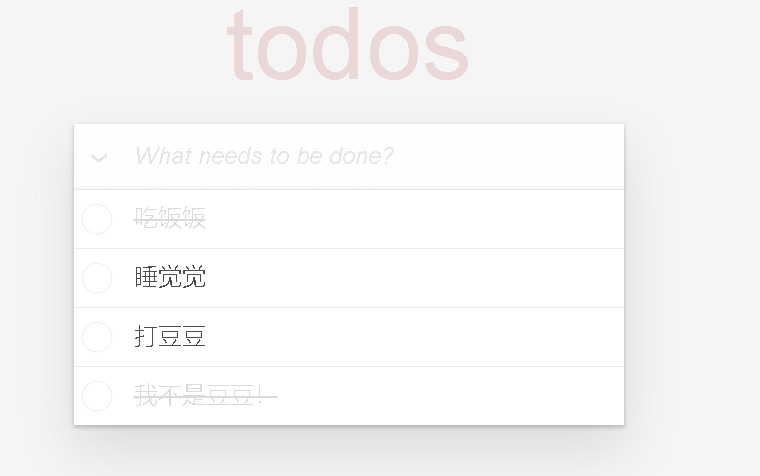
3.3- 列表修改
在 todos List 的样式状态,除了未完成、已完成,还有一个编辑中的状态,双击 todo 项目,切换到编辑状态,对 todo 中 input 进行聚焦,在失去焦点时候恢复为原来对应的状态。在本次任务中,我们一起来完成列表的修改。
任务要求:
1、双击 todo 内容,其下面的 input 聚焦
2、对 todo 的 input 修改后失去焦点或者按回车键,返回原来 todo 状态并展示修改后的内容
任务提示:
为 todo 中 label 元素绑定 dbclick 事件,当点击 todo 时候把 todo 存储到 Vue.data.editTodo 属性中,同时把当前的 title 存储到 Vue.data.beforeEditCache 作为缓存,方便撤销操作。
在 todos 渲染中判断,如果 editTodo 等于该 todo 则显示编辑状态并且其 input 聚焦
1、为 input 元素于 todo.title 进行双向绑定,当修改 input 时同时修改 title 属性
2、为 input 绑定键盘事件与失去焦点事件,当时机出发时设置 editTodo 为 Null 返回原来状态。
3、为 input 绑定 ese 取消事件,取 beforeEditCache 的值重设。
1 | <li v-for="(item,index) in show" :class="[item.completed && 'completed',item.editing && 'editing']"> |
1 | methods:{//数据 |
3.4-状态切换
当前 todo中有 完成和未完成两个状态,当我们点击项目状态选项时候,反选其状态,同时在顶部输入框左侧的全选按钮,点击选项及点击全反选。在本次任务中,我们需要完成 Todos 的完成与未完成的状态切换。
任务要求:
1、点击完成的 todo 左侧状态按钮,切换为未完成
2、点击未完成的 todo 左侧状态按钮,切换未完成
3、单击顶部全选按钮,如果未全选切换所有 todo 为全选
4、点击顶部全选按钮,如果全选切换所有 todo 为未全选
任务提示:
1、为 checkbox 双向绑定 todo.completed 属性
2、为 Vue.computed 添加 allDone ,其 get 读取属性返回当前所有 todos 的 completed 是否为 true,其 set 设置所有 todos 的 completed 值为当前 get 值的反选择。
双向绑定 todo.completed 属性
1 | <input class="toggle-all" id="toggle-all" type="checkbox" :checked="chooseAll"> |
1 | <input class="toggle" type="checkbox" :checked="item.completed" @click="toggleCompleted(index)"> |
1 | toggleCompleted(index){ |
3.5- 添加项目
本任务中,我们为列表添加多一项,当用户在顶部输入框输入时,当按钮下回车键时候,为列表中添加当前项目,title 为输入值,状态为未完成。
任务要求:
1、在输入框中输入完毕,按回车键,往列表中添加未完成的一项
任务提示:
1、为顶部输入框绑定监听回车事件,事件触发时候为 todos 数据中 push 一项,同时讲当前 value 设置为空。
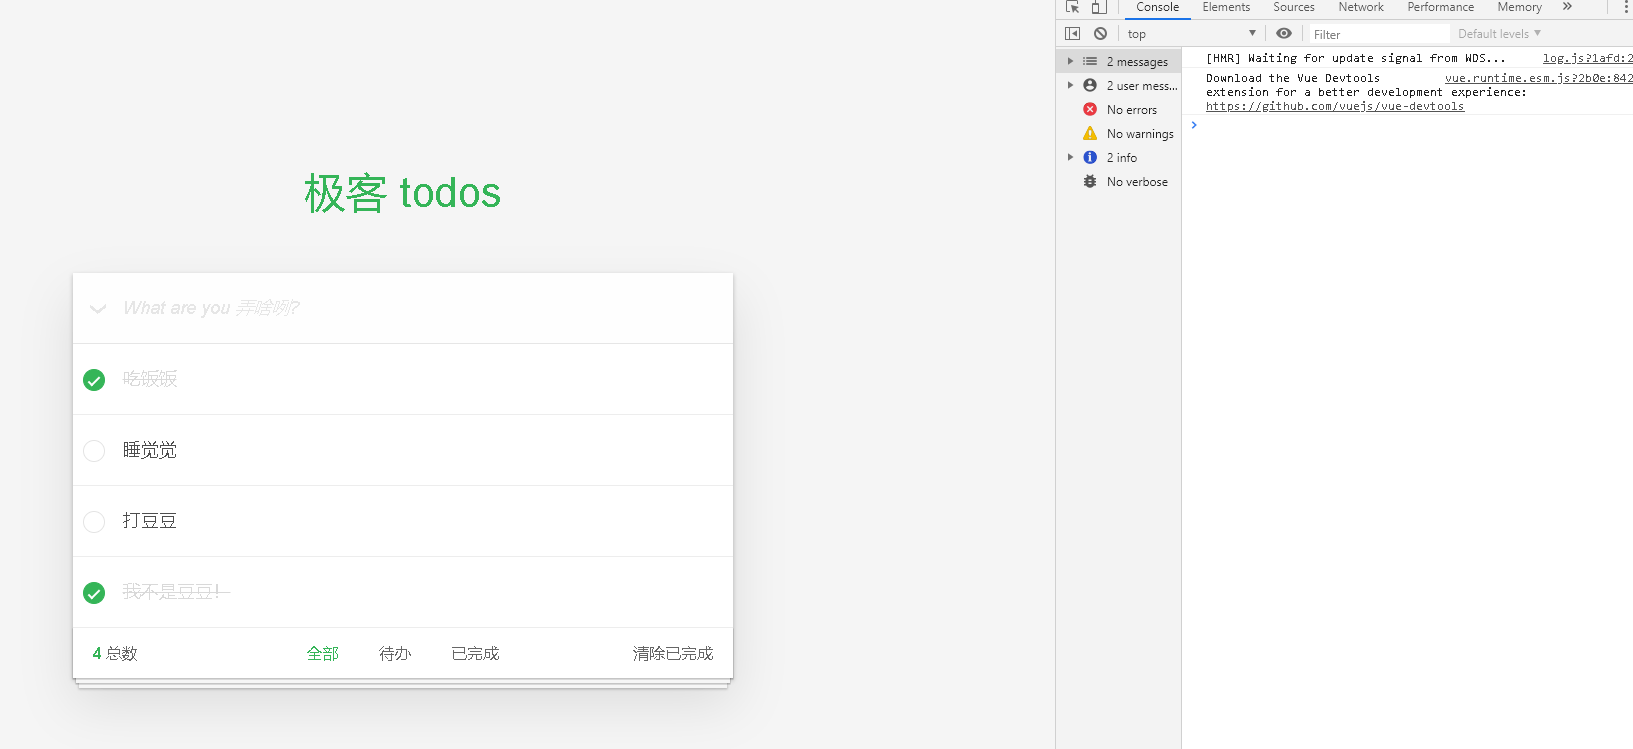
1 | <input class="new-todo" placeholder="What are you 弄啥咧?" autofocus @keyup.enter="create" v-model="value">//绑定键盘回车事件 |
1 | create(){ |
3.6- 删除项目
本任务中,我们需要来完成删除项目的功能。删除场景主要有 2 个,一个为在 todo hover 之后的右侧有一个关闭按钮,当点击关闭按钮时候删除当前 todo 项目。在脚步导航的右侧有一个删除所有已完成的按钮,点击删除所有已完成的 todo 项目。
任务要求:
1、完成单条 todo 删除功能
2、完成所有已完成的 todo 删除功能
任务提示:
1、为删除按钮绑定点击事件,点击在 todos 移除当前自己的项目
2、为删除所有按钮绑定点击事件,点击 todos.filter 一下 todo 重新设置 todos
给button绑定一个点击事件
1 | <button class="destroy" @click="destroy(index)"></button> |
利用splice删除添加删除项目和数量
1 | destroy(index){ |
获取todos的内容,过滤掉completed为false的内容
1 | clearCompleted(){ |
3.7- 项目筛选
在底部导航位置有三个状态,分别为 all、active、completed,全部、进行中、已完成的意思,在本次任务中,我们需要筛选切换不同的状态来动态展示对应状态的数据。
任务要求:
1、默认在 all 状态,展示所有状态 todo 。
2、点击 active 状态,展示没有完成的 todo 。
3、点击 completed 状态,展示已完成的 todo 。
任务提示:
1、定义 Vue.data.filter 状态为 all
2、定义展示数据 showTodo ,更具 filter 的类型返回不同的数据
3、点击导航切换 filter 的值
给li绑定一个v-for,数据来自filters;给a标签绑定点击事件,把key参数传进点击事件,显示层利用数据驱动,有多少就渲染就多少
1 | <li v-for="(item,key) in filters"> |
把data里的参数换成key的参数
1 | changeFilter (key) { |
效果图
3.8 - 组件分离
在以上任务中,我们已经完成了 Todos 的增删改查大逻辑的功能,在接下来这个任务中,我们需要对我们的代码进行组件分离。目前我们的代码全部都写在 App.vue 上面,接下来我们需要对其进行拆分,例如拆分为 TheHeader 头部输入框、TodeList 展示列表、以及 TheFooter 尾部,然后再组合应用在 App.vue 中。
任务要求:
1、把页面拆分为 TheHeader、TodoList、TheFooter 三个部分
2、分离后能正常使用
任务提示:
在1、 compmoents 目录中新建对应的五个部分文件1
2
3
4
5components/TheHeader.vue
components/TheList.vue
components/TheFooter.vue
App.vue
assets/index.css
组件分离
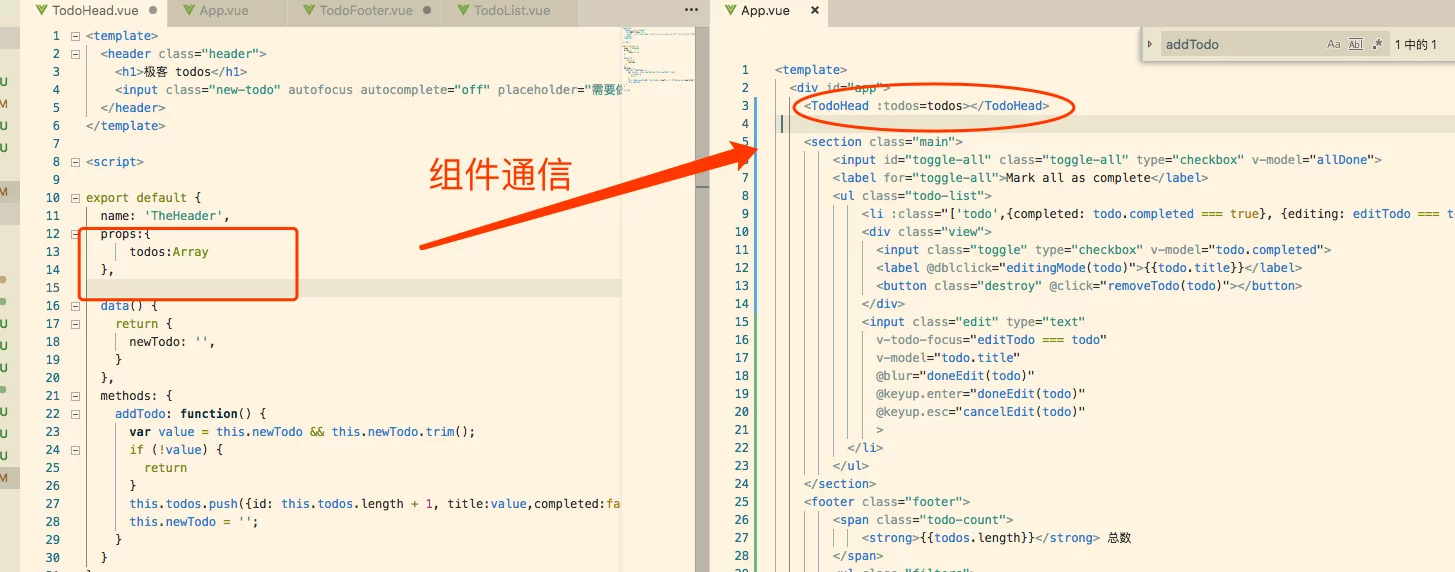
App.vue
1 | <template> |
TheHeader.vue
1 | <template> |
TheList.vue
1 | <template> |
TheFooter.vue
1 | <template> |
3.9- 添加路由
Vue Router 是 Vue.js 官方的路由管理器。它和 Vue.js 的核心深度集成,让构建单页面应用变得易如反掌。vue-router 默认 hash 模式 —— 使用 URL 的 hash 来模拟一个完整的 URL,于是当 URL 改变时,页面不会重新加载。如果不想要很丑的 hash,我们可以用路由的 history 模式,这种模式充分利用 history.pushState API 来完成 URL 跳转而无须重新加载页面。
任务要求:
1、下载并使用 vue-router ,开启 history 模式
2、匹配地址到指定的组件中
3、当点击切换导航时候,URL 地址发送变化,列表数据也发生变化
4、当在某路由原地刷新,列表数据保持和路由对应的状态不变
任务提示:
1、下载 vue-router,并在 main.js 中引入vue.use 路由
2、路由配置 history 及 routes 属性
3、在 new Vue 中传入路由
4、在 App.vue 中配置 router-view
5、在底部导航配置 router-link 抽离容器组件 TheTodes 使用 watch 监听 $router 的变化,在触发的回调函数中获取 params 的值,修改 filter 数据。同时在页面 created 生命周期中也调用此回调函数。
下载vue-router
1 | npm install vue-router |
参考地址https://router.vuejs.org/zh/installation.html
在router.js中配置路由
1 | import Vue from 'vue' |
在 new Vue 中传入路由
1 | import Vue from 'vue' |
在 App.vue 中配置 router-view
1 | <template> |
内容都转移到views/Todos.vue
在底部导航配置 router-link
####在底部导航配置 router-link 抽离容器组件 TheTodes 使用 watch 监听 $router 的变化,在触发的回调函数中获取 params 的值,修改 filter 数据。同时在页面 created 生命周期中也调用此回调函数。1
2
3<li v-for="(item,key) in filters">
<router-link :class="[filter === key && 'selected']" :to="'/' + key">{{item}}</router-link>
</li>
在底部导航配置 router-link 抽离容器组件 TheTodes 使用 watch 监听 $router 的变化,在触发的回调函数中获取 params 的值,修改 filter 数据。同时在页面 created 生命周期中也调用此回调函数。
1 | computed:{ |
####
####
####